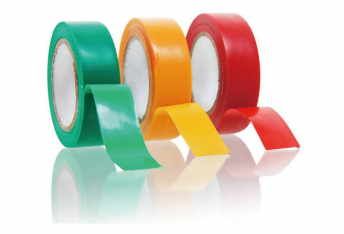
How to Use Self-Amalgamating Tape A Comprehensive Guide
Self-amalgamating tape, also known as self-fusing tape or silicone tape, is an innovative and highly effective solution for a variety of sealing, insulating, and repairing tasks. Unlike traditional adhesive tapes, self-amalgamating tape adheres to itself without the need for any sticky substances. This unique property makes it ideal for a range of applications, including electrical repairs, plumbing fixes, and even automotive uses. In this guide, we will explore what self-amalgamating tape is, its benefits, and a step-by-step process on how to use it effectively.
What is Self-Amalgamating Tape?
Self-amalgamating tape is made from a rubber or silicone material that fuses upon contact with itself when stretched and wrapped. This process creates a solid barrier that is waterproof, insulating, and resistant to extreme temperatures. Because it doesn't use adhesive, it leaves no residue when removed and can be used on various surfaces, such as metal, plastic, and glass.
Benefits of Self-Amalgamating Tape
1. Waterproofing It creates a watertight seal, making it ideal for outdoor applications or areas exposed to moisture. 2. Insulation The tape provides excellent electrical insulation, protecting wires and connectors from short circuits and environmental damage.
3. Flexibility Due to its stretchy nature, self-amalgamating tape can conform to various shapes and surfaces, ensuring a secure fit.
4. Temperature Resistance It can withstand high and low temperatures, making it suitable for use in both hot and cold environments.
5. Chemical Resistance The tape is resistant to a variety of chemicals and oils, allowing for versatile use in different contexts.
How to Use Self-Amalgamating Tape
self amalgamating tape how to use

Using self-amalgamating tape is a straightforward process. Follow these steps to ensure a successful application
1. Prepare the Surface Before applying the tape, clean the surface where it will be applied. Remove any dirt, grease, or moisture for the best adhesion. Ensure that the area is dry, as moisture can hinder the fusing process.
2. Cut the Tape Measure and cut an appropriate length of self-amalgamating tape for your specific application. It’s often a good idea to use a bit more than you think you’ll need, as overlapping the tape will strengthen the bond.
3. Stretch the Tape Start by stretching the tape slightly as you begin to wrap it around the area of repair. Stretching activates the self-fusing properties of the tape, which is crucial for a proper seal.
4. Wrap the Tape Begin wrapping the tape around the surface, overlapping each layer by about half its width for maximum effectiveness. Ensure that you apply firm tension as you wrap to create a tight seal.
5. Finish Off Once you have covered the area sufficiently, press the end of the tape down firmly to ensure it fuses with the layer underneath. Allow the tape to set for a few minutes, during which it will continue to bond with itself.
6. Check the Seal After the tape has had time to amalgamate, inspect the area to ensure that there are no gaps or loose edges. It should feel solid to the touch.
Conclusion
Self-amalgamating tape is a versatile and easy-to-use tool for anyone looking to tackle repairs at home or in the workplace. Its unique ability to fuse to itself without adhesives makes it an indispensable item for any toolbox. Whether you’re an experienced DIY enthusiast or just starting, mastering the use of self-amalgamating tape can simplify your repair tasks and enhance the longevity of your projects.
-
XIANGFAN Rubber Tape-Ultimate Solutions for All Your Insulation NeedsNewsJun.24,2025
-
XIANGFAN Rubber Tape-Protection for Industrial and Residential ApplicationsNewsJun.24,2025
-
XIANGFAN Rubber Tape: Superior Safety and Sealing for Demanding EnvironmentsNewsJun.24,2025
-
XIANGFAN Rubber Tape: Reliable Solutions for Every Electrical ChallengeNewsJun.24,2025
-
XIANGFAN Electrical & Industrial Tape: Powering Reliability Across IndustriesNewsJun.24,2025
-
XIANGFAN Electrical & Industrial Tape: Excellence in Every ApplicationNewsJun.24,2025
