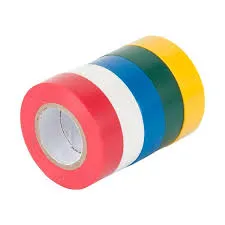
How to Use Self-Amalgamating Repair Tape
Self-amalgamating repair tape, also known as self-fusing or silicone tape, is a versatile and handy tool for a variety of repair tasks. Its unique properties allow it to bond to itself without the need for adhesives, making it a popular choice for those looking for quick and durable fixes. This article will guide you through the basics of using self-amalgamating repair tape effectively.
What is Self-Amalgamating Repair Tape?
Self-amalgamating repair tape is made from silicone or rubber materials that have been designed to fuse together upon contact. Unlike traditional adhesive tapes, self-amalgamating tapes do not have a sticky side, which allows them to stretch and mold around surfaces seamlessly. Once applied, the tape forms a strong, waterproof barrier that can withstand high temperatures and a range of environmental conditions.
Preparing for Application
Before applying self-amalgamating tape, it’s essential to prepare the surface properly. Clean the area where the tape will be applied, removing any dirt, grease, or moisture. This ensures optimal adhesion and effectiveness of the tape. If the surface is wet or oily, the tape may not bond properly, resulting in a less effective repair.
Step-by-Step Application
1. Measure the Length Determine how much tape you will need by measuring the area you plan to cover. It is advisable to cut a piece that is slightly longer than the damaged area to ensure adequate coverage.
2. Start Wrapping Begin to wrap the tape around the repair area, making sure to overlap each layer by about half of its width. This overlap is crucial in ensuring a strong bond. While wrapping, stretch the tape slightly to enhance its adhesion properties.
3. Continue Until Covered Continue wrapping until the entire affected area is covered. The more layers you apply, the stronger the repair will be. Typically, two to three layers are sufficient for a robust seal, but this may vary depending on the application.
how to use self amalgamating repair tape

4. Finish and Press Once you have reached the end of the damaged area, press the tape firmly against itself to secure it in place. Since the tape fuses to itself, there’s no need for additional fastening methods.
5. Allow to Cure After applying the tape, allow it to cure. The curing time can vary but typically takes about 24 hours to fully amalgamate. During this period, avoid subjecting the area to stress or moisture.
Applications of Self-Amalgamating Tape
Self-amalgamating repair tape can be used in many situations, including
- Electrical Repairs It's an excellent choice for insulating wires and cable connections, providing a moisture-resistant seal. - Plumbing Use it to repair leaks in pipes or hoses, as it can handle high pressure and water exposure. - Automotive The tape is useful for quick fixes on hoses, wiring, and other components in vehicles. - Household Repairs It can be utilized on tools, garden equipment, or any other item requiring a temporary or permanent repair.
Safety Precautions
While self-amalgamating tape is relatively safe, it’s essential to take some precautions. Avoid using it on surfaces that exceed the temperature rating provided by the manufacturer. Moreover, ensure that your hands are clean when handling the tape to avoid contamination.
Conclusion
Self-amalgamating repair tape is a fantastic solution for various repair needs—offering durability, flexibility, and ease of use. By following the steps outlined above, you can tackle numerous repairs effectively, saving time and resources. Whether you are a DIY enthusiast or just need a quick fix, this tape is a reliable component to have in your toolkit.
-
XIANGFAN Rubber Tape-Ultimate Solutions for All Your Insulation NeedsNewsJun.24,2025
-
XIANGFAN Rubber Tape-Protection for Industrial and Residential ApplicationsNewsJun.24,2025
-
XIANGFAN Rubber Tape: Superior Safety and Sealing for Demanding EnvironmentsNewsJun.24,2025
-
XIANGFAN Rubber Tape: Reliable Solutions for Every Electrical ChallengeNewsJun.24,2025
-
XIANGFAN Electrical & Industrial Tape: Powering Reliability Across IndustriesNewsJun.24,2025
-
XIANGFAN Electrical & Industrial Tape: Excellence in Every ApplicationNewsJun.24,2025
