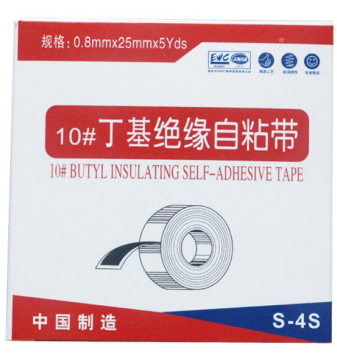
How to Use Amalgamating Tape A Comprehensive Guide
Amalgamating tape, often referred to as self-amalgamating tape or PVC tape, is a versatile and highly effective insulating tape used in a variety of applications. This unique tape blends rubber and plastic, making it an ideal choice for electrical insulation, plumbing repairs, and even automotive uses. Its specialty lies in its ability to bond to itself without the need for adhesives, creating a solid, waterproof seal. In this article, we will explore how to effectively use amalgamating tape and the various applications it serves.
What is Amalgamating Tape?
Amalgamating tape is typically made from a rubber adhesive and is designed to adhere to itself upon stretch or pressure. It does not stick to other materials, which makes it easy to remove and reposition as needed. This tape is highly resilient, resistant to UV rays, ozone, and moisture, making it suitable for both indoor and outdoor use.
Step-by-Step Guide to Using Amalgamating Tape
1. Preparation
Before using amalgamating tape, ensure that the surface is clean and dry. Any dirt, dust, or grease can prevent the tape from sealing properly. You may need to clean the surface with isopropyl alcohol and allow it to dry completely.
2. Cut the Tape
Depending on the size of the area you need to cover, cut a length of amalgamating tape. A good rule of thumb is to cut a piece that is at least twice the length of the section you’re wrapping. This will provide enough overlap to ensure a solid bond.
Start applying the tape by anchoring one end to the surface. Begin wrapping it around the object, stretching the tape as you go. Make sure to overlap each layer by at least half of the tape width. This ensures full coverage and maximum insulation.
4. Continue Wrapping
As you continue to wrap, keep tension on the tape. This not only helps it bond with itself but also allows for a tighter and smoother finish. Be cautious not to pull too hard, as this might cause the tape to tear.
how to use amalgamating tape

5. Finish Off
Once you have covered the desired area, cut the tape, leaving a bit of excess to overlap back on itself. Press down firmly on the end to ensure it melds onto the previously wrapped layers.
6. Let it Cure
Amalgamating tape needs time to amalgamate, which typically takes around 24 hours to fully bond. During this curing time, avoid applying any stress to the tape to ensure a solid, watertight seal.
Applications of Amalgamating Tape
Amalgamating tape has a wide array of applications
- Electrical Insulation It is widely used for insulating electrical wires and connections, providing a waterproof and protective barrier that prevents moisture ingress.
- Plumbing Repairs The tape can be used to seal leaks in pipes or fittings temporarily until a more permanent repair can be conducted.
- Automotive Applications Mechanics often use amalgamating tape for wrapping wires, bundling cables, and sealing connections that are subject to harsh environments.
- Crafts and DIY Projects The tape's unique properties also make it popular among craft enthusiasts for various projects, including insulation for decorative lighting.
Conclusion
Amalgamating tape is a remarkable tool that provides an effective solution for insulation and sealing needs. Its ability to create a lasting bond without adhesives makes it easy to use and reposition as necessary. By following the simple steps outlined in this guide, you can harness the full potential of amalgamating tape for your projects and repairs. Whether you’re an electrician, plumber, mechanic, or DIY enthusiast, having amalgamating tape in your toolkit will undoubtedly serve you well. Always remember to follow safety precautions when handling any kind of tape, especially in electrical applications.
-
XIANGFAN Rubber Tape-Ultimate Solutions for All Your Insulation NeedsNewsJun.24,2025
-
XIANGFAN Rubber Tape-Protection for Industrial and Residential ApplicationsNewsJun.24,2025
-
XIANGFAN Rubber Tape: Superior Safety and Sealing for Demanding EnvironmentsNewsJun.24,2025
-
XIANGFAN Rubber Tape: Reliable Solutions for Every Electrical ChallengeNewsJun.24,2025
-
XIANGFAN Electrical & Industrial Tape: Powering Reliability Across IndustriesNewsJun.24,2025
-
XIANGFAN Electrical & Industrial Tape: Excellence in Every ApplicationNewsJun.24,2025
