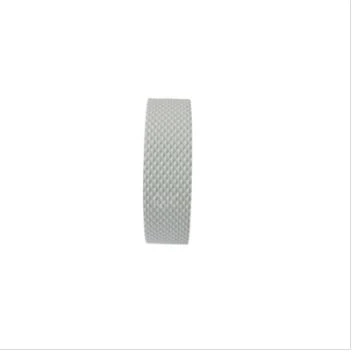
How to Use Amalgamating Tape A Comprehensive Guide
Amalgamating tape is a versatile and efficient sealing solution widely used in various applications, from electrical to plumbing repairs. Unlike traditional tapes, amalgamating tape, often made from rubber or polymer materials, adheres to itself when stretched and requires no adhesive backing. This property makes it ideal for creating watertight seals, insulating electrical components, or providing protection against mechanical wear. In this article, we will explore how to use amalgamating tape effectively in different scenarios, ensuring a reliable and long-lasting bond.
Understanding Amalgamating Tape
Before we dive into how to use amalgamating tape, it's essential to understand its unique properties. Amalgamating tape is non-adhesive and relies on the pressure and heat generated when the tape is stretched and wrapped around objects. Therefore, it is crucial to apply it correctly to achieve optimal performance. The tape is often resistant to chemicals, moisture, and UV light, making it suitable for both indoor and outdoor use.
Application Scenarios
1. Electrical Insulation One of the most common uses for amalgamating tape is in electrical insulation. When dealing with exposed wires or connections, simply wrap the tape around the area, ensuring a tight fit. Stretch the tape as you wrap it, which will help it bond to itself and create a solid, insulative layer. This is essential for protecting against moisture and preventing electrical hazards.
2. Plumbing Repairs Amalgamating tape can also be a handy tool for plumbing applications. If you have a leak in a pipe joint or a fitting, clean the surface thoroughly and then wrap the tape around the area at least a few times, ensuring you cover any exposed sections completely. The tape's water-resistant properties will help seal the leak temporarily until a more permanent repair can be made.
3. Cables and Hoses For mechanics or DIY enthusiasts, amalgamating tape is perfect for bundling and protecting cables or hoses. Wrap the tape around the grouping of cables or hoses, allowing the tape to stretch. This not only provides a neat appearance but also protects against abrasion and wear over time.
Step-by-Step Guide on Applying Amalgamating Tape
Step 1 Prepare the Surface Before applying amalgamating tape, ensure that the surface is clean and dry
. Remove any dirt, grease, or moisture, as these can affect the tape's ability to bond properly.how to use amalgamating tape

Step 2 Cut the Tape Cut a length of amalgamating tape that is adequate for your project. It's better to start with a piece that is too long than too short, as you can always trim excess tape later.
Step 3 Position the Tape Position the tape at the start of the area you want to cover. If you are insulating electrical wires, begin wrapping just above the exposed section.
Step 4 Begin Wrapping Carefully wrap the tape around the object, stretching it slightly as you go. Make sure to overlap each layer by 50% to ensure a solid bond. The more layers you apply, the more secure the seal will be.
Step 5 Finish and Secure Once you reach the end of the area, press the tape down flat against itself to ensure a proper bond. There’s no need for additional adhesives; the tape’s properties will bond it securely.
Final Tips
- Temperature Considerations While amalgamating tape is durable, it performs best within specific temperature ranges. Avoid using it in extremely hot or cold conditions unless it is specifically designed for such environments.
- Check for Compatibility Make sure that the materials you are working with are compatible with amalgamating tape to avoid any potential issues.
- Store Properly When not in use, store amalgamating tape in a cool, dry place to preserve its properties.
In conclusion, amalgamating tape is a reliable and efficient tool for various repair and insulation tasks. With the right technique, you can achieve effective seals and protection, making it a valuable addition to your toolkit. Whether you're an electrician, plumber, or DIY enthusiast, understanding how to use amalgamating tape can save you time and effort in your projects.
-
XIANGFAN Rubber Tape-Ultimate Solutions for All Your Insulation NeedsNewsJun.24,2025
-
XIANGFAN Rubber Tape-Protection for Industrial and Residential ApplicationsNewsJun.24,2025
-
XIANGFAN Rubber Tape: Superior Safety and Sealing for Demanding EnvironmentsNewsJun.24,2025
-
XIANGFAN Rubber Tape: Reliable Solutions for Every Electrical ChallengeNewsJun.24,2025
-
XIANGFAN Electrical & Industrial Tape: Powering Reliability Across IndustriesNewsJun.24,2025
-
XIANGFAN Electrical & Industrial Tape: Excellence in Every ApplicationNewsJun.24,2025
