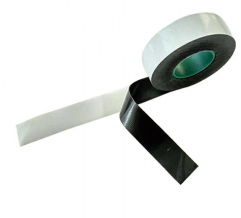
How to Use Self-Amalgamating Tape A Comprehensive Guide
Self-amalgamating tape, often referred to as self-fusing tape, is a versatile and practical solution for a variety of sealing, insulating, and repairing tasks. Unlike traditional adhesives, this type of tape does not have any sticky backing. Instead, it bonds to itself when wrapped tightly, creating a secure and waterproof seal. Here’s a step-by-step guide on how to effectively use self-amalgamating tape.
Step 1 Prepare the Surface
Before applying the tape, ensure that the surface is clean, dry, and free of any debris. This helps the tape achieve a better bond. For electrical applications, it’s crucial to check for any oil or grease, as these can impede adhesion. If necessary, wipe the area with an appropriate solvent to enhance cleanliness.
Step 2 Cut the Required Length
Measure the amount of tape you’ll need for your specific application. It’s advisable to cut a length that is at least double the size of the area you are working on. This provides enough material to ensure overlapping layers, which enhances the strength and reliability of the bond.
Step 3 Start Wrapping
how to use self amalgamating tape

To begin, peel off the protective layer if there is one. Then, initiate the wrapping process at one end of the repair area, holding the tape at a slight angle. As you wrap, stretch the tape slightly while ensuring each layer overlaps the previous one by about half. This self-fusion process allows the layers to bond effectively to one another, creating a durable seal.
Step 4 Complete the Seal
Continue wrapping until you completely cover the area, ensuring that you maintain consistent tension throughout the process. Once you reach the end of the tape, simply cut it off and press the end against the wrapped layers to secure it in place. The tape will then take a few hours to fully fuse, providing you a robust and waterproof seal.
Step 5 Allow Time to Cure
After application, it is essential to let the tape cure for at least 24 hours before exposing it to harsh conditions. This allows it to form a strong bond, ensuring long-lasting performance.
Final Thoughts
Self-amalgamating tape is a convenient and effective solution for a variety of applications, from electrical wiring to plumbing repairs. With proper preparation and application, you can utilize this tape to create reliable, watertight seals that stand the test of time. Whether you are tackling a DIY project or handling a professional repair, mastering the use of self-amalgamating tape will surely enhance your toolkit.
-
XIANGFAN Rubber Tape-Ultimate Solutions for All Your Insulation NeedsNewsJun.24,2025
-
XIANGFAN Rubber Tape-Protection for Industrial and Residential ApplicationsNewsJun.24,2025
-
XIANGFAN Rubber Tape: Superior Safety and Sealing for Demanding EnvironmentsNewsJun.24,2025
-
XIANGFAN Rubber Tape: Reliable Solutions for Every Electrical ChallengeNewsJun.24,2025
-
XIANGFAN Electrical & Industrial Tape: Powering Reliability Across IndustriesNewsJun.24,2025
-
XIANGFAN Electrical & Industrial Tape: Excellence in Every ApplicationNewsJun.24,2025
