How to Use Amalgamating Tape A Comprehensive Guide
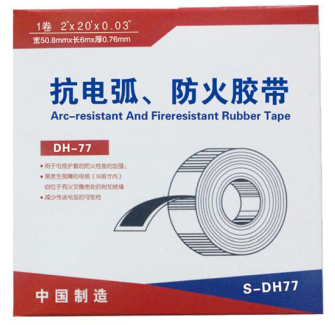
Amalgamating tape, often referred to as self-amalgamating tape, is a versatile tool that can be used in a variety of applications, from electrical insulation to plumbing repairs. Unlike conventional adhesive tapes, amalgamating tape bonds to itself without the need for a sticky backing. This unique feature allows for a seamless fusion that creates an airtight and waterproof seal. Here is a comprehensive guide on how to effectively use amalgamating tape.
Understanding Amalgamating Tape
Amalgamating tape is typically made from a synthetic rubber material that provides excellent resistance to moisture, chemicals, and UV light. It is highly elastic, making it easy to stretch and wrap around irregular shapes. This tape comes in various widths and thicknesses, allowing users to choose the appropriate size for specific tasks.
Preparing the Surface
Before using amalgamating tape, it is crucial to prepare the surface properly. Ensure the area is clean, dry, and free from dust, oil, or any contaminants that could affect the tape’s ability to bond. For best results, wipe the surface with rubbing alcohol or a similar cleaning agent and allow it to dry completely.
How to Apply Amalgamating Tape
1. Start the Application Begin by cutting a length of amalgamating tape. For most applications, a piece that is about six inches longer than the area you need to cover is recommended. This extra length allows for overlapping layers, which is key to achieving a solid bond.
2. Initial Wrap Position the end of the tape on the surface you’re working on and begin to wrap it around the area. Make sure to apply the tape with moderate tension — not too tight, as this can cause tearing, and not too loose, as it may compromise the seal.
amalgamating tape how to use

3. Overlap Layers As you continue to wrap the tape, ensure that you overlap each turn by about half the width of the tape. This overlapping is essential for creating a robust seal, ensuring that there are no gaps through which water or air could escape.
4. Finishing Off Once you reach the end of the area you need to cover, cut the tape, leaving a few extra inches if possible. Smooth the edge down to ensure it adheres well to the underlying layer. The tape will naturally fuse to itself without any additional adhesive.
Best Practices
- Layering In situations where additional strength is needed, consider applying multiple layers of tape. Each layer should follow the same overlapping technique for maximum effectiveness.
- Temperature Considerations While amalgamating tape performs well in various temperatures, it is advisable to apply it within the manufacturer’s recommended temperature range for optimal results.
- Storage Store the tape in a cool, dry place away from direct sunlight to preserve its properties.
Common Applications
Amalgamating tape is ideal for a range of uses, including electrical insulation for wires, temporary plumbing repairs, sealing joints in hoses, and even protective wrapping for sports equipment. Its waterproof nature makes it especially valuable for outdoor applications.
In conclusion, amalgamating tape is a powerful and practical solution for many sealing and insulation needs. By following the proper application techniques and best practices, you can ensure a secure and lasting bond, making your projects easier and more efficient. Whether you are a DIY enthusiast or a professional tradesperson, mastering the use of amalgamating tape is a skill that will serve you well.
-
XIANGFAN Rubber Tape-Ultimate Solutions for All Your Insulation NeedsNewsJun.24,2025
-
XIANGFAN Rubber Tape-Protection for Industrial and Residential ApplicationsNewsJun.24,2025
-
XIANGFAN Rubber Tape: Superior Safety and Sealing for Demanding EnvironmentsNewsJun.24,2025
-
XIANGFAN Rubber Tape: Reliable Solutions for Every Electrical ChallengeNewsJun.24,2025
-
XIANGFAN Electrical & Industrial Tape: Powering Reliability Across IndustriesNewsJun.24,2025
-
XIANGFAN Electrical & Industrial Tape: Excellence in Every ApplicationNewsJun.24,2025
