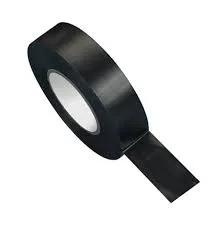
How to Use Self-Amalgamating Tape A Comprehensive Guide
Self-amalgamating tape, also known as self-fusing tape, is a versatile product commonly used in various applications, from electrical insulation to plumbing repairs. Its unique properties allow the tape to bond to itself without the need for adhesive, creating a waterproof and air-tight seal. This article will guide you on how to effectively use self-amalgamating tape to achieve optimal results.
What is Self-Amalgamating Tape?
Self-amalgamating tape is made from a rubber-based material that fuses to itself when wrapped under tension. It comes in rolls and is available in various thicknesses and colors. The tape is particularly useful in scenarios where a durable and flexible seal is required, as it can withstand extreme temperatures and environmental conditions.
Preparing to Use the Tape
Before applying self-amalgamating tape, it is crucial to prepare the surface properly. Begin by cleaning the area you intend to tape. Remove any dirt, oil, or moisture to ensure the tape adheres effectively. For electrical applications, ensure that the power supply is turned off to avoid accidents. If the surface is rough or uneven, consider smoothing it out to enhance the tape’s performance.
Application Steps
1. Cut the Tape Measure and cut a length of self-amalgamating tape suitable for your project. Generally, it’s better to have a bit more than you think you'll need to ensure complete coverage.
2. Stretch the Tape When applying the tape, stretch it slightly as you wrap it around the surface. This tension is essential for the tape to fuse properly. Avoid applying the tape too loosely, as this can lead to weak points and potential leaks.
self amalgamating tape how to use

3. Overlap Layers If you need to cover a larger area, overlap the tape by about 50% with each turn. This overlapping ensures that there are no gaps and provides maximum protection against moisture and electrical hazards.
4. Finish the Application Once you have wrapped the area sufficiently, press the end of the tape down firmly to ensure a secure seal. The tape will begin to fuse together, forming a solid barrier.
5. Curing Time After application, allow the tape to cure for at least a few hours, depending on the environmental conditions. The longer it cures, the stronger the bond will be.
Tips for Successful Use
- Temperature Considerations Ensure that the temperature is within the recommended range for the tape during application. Ideal temperatures for application are usually between 20°C and 30°C (68°F to 86°F).
- Store Properly If you have leftover tape, store it in a cool, dry place away from direct sunlight to preserve its longevity.
- Testing After the tape has cured, conduct a test to ensure that it holds up to the expected pressure or heat. This is particularly important in critical applications, such as electrical insulation or plumbing repairs.
Conclusion
Self-amalgamating tape is an excellent tool for both professionals and DIY enthusiasts alike. Its ease of use and effectiveness in sealing leaks or providing insulation make it a favorite among many. By following the preparation and application steps outlined in this guide, you can ensure a successful and durable result in your projects. Whether you are working on electrical repairs or household plumbing issues, self-amalgamating tape can save you time, effort, and money.
-
XIANGFAN Rubber Tape-Ultimate Solutions for All Your Insulation NeedsNewsJun.24,2025
-
XIANGFAN Rubber Tape-Protection for Industrial and Residential ApplicationsNewsJun.24,2025
-
XIANGFAN Rubber Tape: Superior Safety and Sealing for Demanding EnvironmentsNewsJun.24,2025
-
XIANGFAN Rubber Tape: Reliable Solutions for Every Electrical ChallengeNewsJun.24,2025
-
XIANGFAN Electrical & Industrial Tape: Powering Reliability Across IndustriesNewsJun.24,2025
-
XIANGFAN Electrical & Industrial Tape: Excellence in Every ApplicationNewsJun.24,2025
